pe5tle - Building a Generative g̶̗͋l̵͛͜ī̷͔t̵̜̂c̷̞͝h̶̹̉ art project with Vue 3 & p5.js | Part 1
participating in Hashnode x Netlify hackathon

Disclaimer, I wrote this for a hackathon, the style is a bit mixed between beginner friendly and going over some slightly advanced concepts, due to the nature of the submission requirements.
Oh my goodness, it is with great relief and slight regret that I am taking a break from development on pe5tle, a generative art app that uses glitch art techniques to deliver a corrupted and aesthetically pleasing (sometimes😅) image, to share it and the development process with y'all.
Play with it here: pe5tle.netlify.app
In this article, I'm going to talk about the project, why I built it and some of and the decisions I made, how I built it (with code examples), and what's next for the project.
About pe5tle
I built pe5tle after seeing the netlify x hashnode hackathon a couple of weeks ago and thought it would be a good opportunity to play with some technologies that I hadn't used before. pe5tle is built with:
- Vue 3, which controls a lot of the user functions as well as the scaffolding, building, and rendering of the project in general
- p5.js, a javascript library that allows drawing to a "canvas". It is based on the Processing language
- p5.glitch, a p5 sublibrary used to interact with the image data, with lots of nice "glitch" functions
- Bootstrap 5, a (mostly) CSS framework for making responsive (mobile to desktop) front ends and user interfaces
- Github, a hub to control versions of the project, host the code, and share it with others
- Netlify, an incredible tool that I use to seamlessly deploy my code, and host it. It is probably the least stressful way to build and host a website
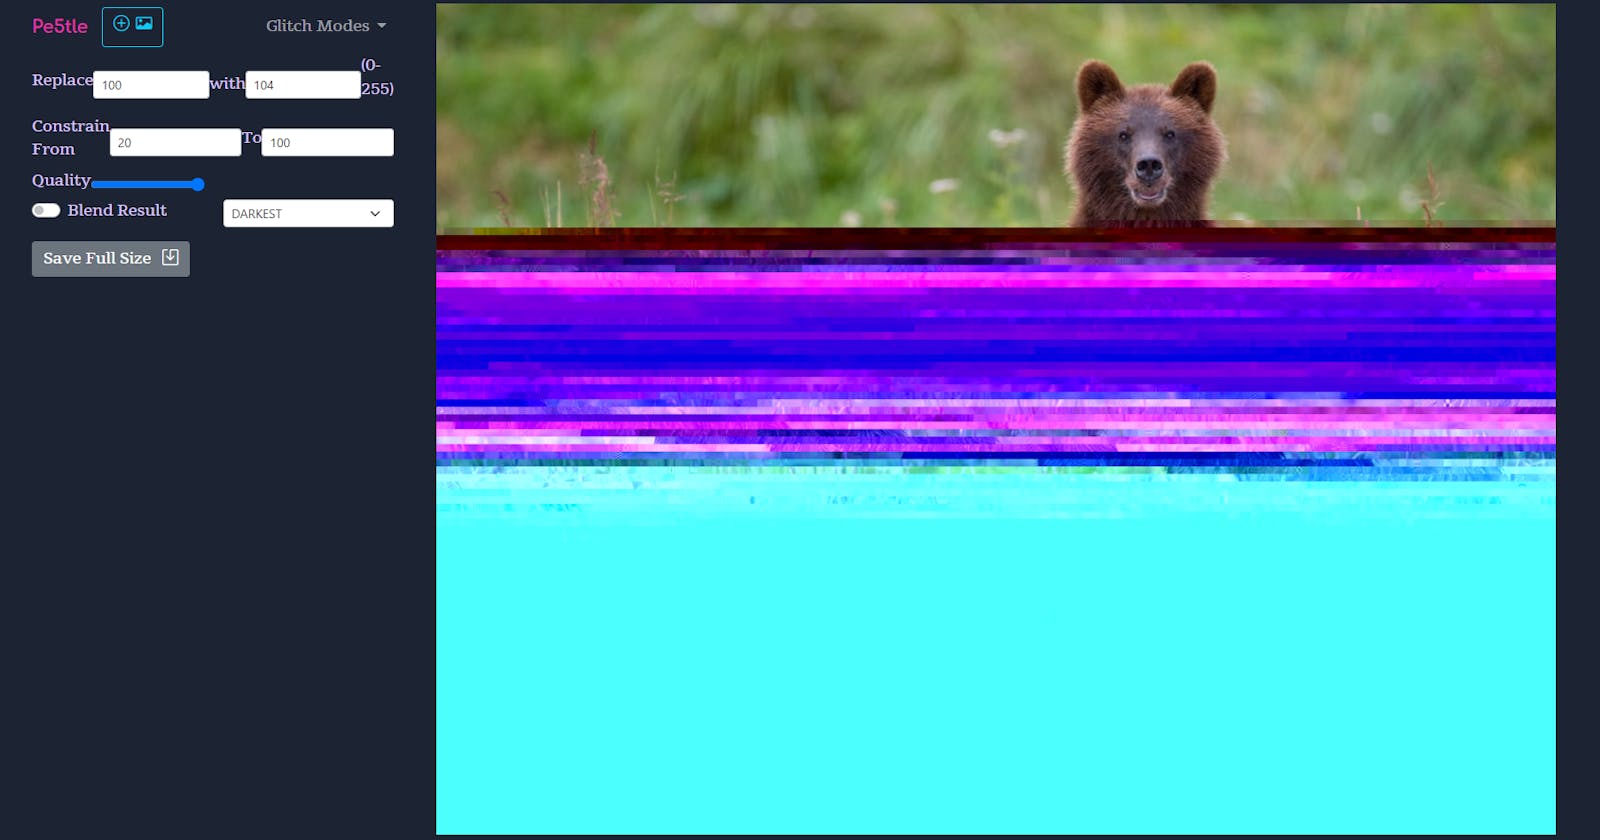
It allows someone to upload their image, glitch it in a number of ways, and save a full size output. Pretty neat! 😎
Use Case & Inspiration
In a discord I am a member of that centers around an art festival, a member expressed that they didn't know how to do :・゚✧ glitch art ✧:・゚ but still wanted to contribute to the festival. And I thought about how all the tools and methods for glitch art were so esoteric, and how user interfaces are few and far between and perhaps a way that it is being kept from artists and people as something "mysterious" or difficult. 😒
There are certainly other generative art apps, out there, easily findable with a google search::
etc. but many of them are effects based and don't act on the image data, or are maybe limited in what they can do. I wanted to build something that not only worked in the browser without a backend (which is why I chose javascript), but that also pulled in some of these Processing and data-based glitch techniques.
Perhaps a year ago, I saw this library, p5.glitch (😲), and thought "I'd like to do something with that one day", and since then have learned a lot about the Vue framework and making web-things with javascript, and decided that this hackathon would an awesome opportunity to make something with it and share it with others.
I'm not here to defend the "use" of art, but there's plenty of fun things you can do with it or use it for:
- Use it to make a profile picture
- Image elements on your website, like as an aesthetic element or like as a hover animation or something
- Make art to share on social media (you can tag the project with #pe5tle on insta if you want 🖤)
- Have fun playing with it
- Explore what changing or randomizing data does to an image, and other glitch techniques
- Make your own glitch image app (its open source: https://github.com/contraptsean/pe5tle)
but enough about what it is, if you have tried it already, you probably can see what it does in the current state, let's talk about::
Building It (ノ◕ヮ◕)ノ*:・゚✧
Working with p5.js and p5.glitch was a challenge, I hadn't really worked on an image app or with any type of rendering or drawing libraries. The only requirement was "make and deploy something on Netlify", which was great because I already knew how easy it was to deploy a project with them.
Broadly speaking, the steps to create the project involved
- Building the project with Vue
- Installing dependencies, packages that I thought I would use in the coding besides Vue, like p5.js and Bootstrap
- Outlining and Coding a minimum viable product, the bare necessary features that I wanted to show off in the project
- Making the UI responsive and operable on a mobile device
- Creating a repository on Github and sending the code
- Setting up Netlify to deploy my code to a website whenever there are changes to the Github repository
technology decisions
There are a lot of ways to "make something", and I'm not here to tell you what to do. I'm here to share with you how I made something, and I wanted to share some of the reasoning for the technologies I decided to use in actually building the project:
Vue
was used to build the project as we will see in the next step, as well as for the architecture and framework functions it offers out of the box. I decided on it because of my familiarity with the framework, and I wanted to build something that used Vue as kind of the master controller, and leveraged other technology to do something cool.
There were a lot of issues with getting these technologies to play nice and work well together, mostly with my lack of understanding with how p5.js functioned.
options api v composition api
These are two ways to set up a Vue script essentially.
I have some small familiarity with both options, the options api is built out of the composition api, sort of packages some of those composition functions. The composition api can be used to make a component that has a few different functions going on more readable, to package the code more easily. However I have found on smaller projects, the options api makes my code more readable and helps me compose my thoughts a bit better.
I made the decision to use the options api over the composition api, particularly considering this project only has a central function currently: to do some effect to an image and return it. If I decide to change in the future it is pretty easy though. Read more here: vuejs.org/guide/extras/composition-api-faq...
p5.js
was sort of a sideline technology that I realized I had to utilize in conjunction with the image data library I wanted to use for the image corruption itself. There's a lot of glitch functions in the Processing language that don't actually involve corrupting or randomizing hex data, but rather things like running mathematical functions on color or brightness (pixel sort comes to mind).
That is to say, I am glad to understand how it functions a bit better now, it was not only instrumental in running the project, and in functions like the blend feature, but will be really useful in building out more functionality in future stages of the project.
That being said, I think there are maybe other rendering engines in this projects future, which I will discuss more in the "What's Net" section at the end.
p5.glitch
is a really awesome little library that extends the functionality of the p5.js library to allow things like acting on the image at a byte level. There are some things in this library that I decided not to utilize, like the animate function, because they didnt fit my idea of what I wanted to build.
However there is a ton of untapped-as-of-yet possibilities and functions in this library that I have ideas for, but haven't had a chance to play with. I'm going to take a short break from development on this project, but will be exploring this more soon for sure.
Bootstrap
is a framework I begrudgingly went over to, not that I don't love it. I just utilize it a lot and was thinking I would branch out a little for this one. I learned some css grid and was some time into doing all the functions to make the layout responsive, writing all the javascript to make dropdowns and tabs, and decided that these UI features were not central to the project, and that I was spending way too much time on those types of features.
So I pulled Bootstrap into the CDN and used a lot of the out of the box functions to quickly get the UI up and running so that I could focus on learning and sharing the glitch art functions.
Now that you know why I chose these technologies, lets set up a new project and build a small proof. For a full review of the code, you can check out the the github. I hope to make a youtube video soon to start The Wax Alchemical Youtube Channel
project setup
The only things you will need in advance is npm and Node. I would highly recommend a code editor, I use Visual Studio Code (its free).
npm will be building the project and installing p5 and can install any other dependencies we may want to manage with npm in the project.
building the project with node
Once you have these installed, open a command line shell, I'm using powershell on Windows and navigate to the folder or place you would like to build your project. I have a special "vue_projects" folder on my desktop.
Simply run npm init vue@latest to get started building Vue project with the Vue build tool. It will ask you a bunch of questions about your project, one by one:
✔ Project name: … <your-project-name>
✔ Add TypeScript? … No / Yes
✔ Add JSX Support? … No / Yes
✔ Add Vue Router for Single Page Application development? … No / Yes
✔ Add Pinia for state management? … No / Yes
✔ Add Vitest for Unit testing? … No / Yes
✔ Add Cypress for both Unit and End-to-End testing? … No / Yes
✔ Add ESLint for code quality? … No / Yes
✔ Add Prettier for code formating? … No / Yes

Scaffolding project in ./<your-project-name>...
Done.
It asks about your Project Name, and what plugins you would like. The only one I wanted to use was Vue Router. This would allow me to use Vue to "route" to different pages, such as pages about the glitch art techniques that are being applied (coming soon!) or the about page.
Once we choose the plugins we want, we can navigate to our new project that was built for us and install the dependencies we have decided on:
cd <your-project-name>
npm install
Before starting our development server and looking at the project, we can go ahead and add p5 to the project, since I know I want to include it as a node project.
Run npm install p5 --save to install p5 and save it as a dependency
Finally run npm run dev to start the Vite server, which is a super fast server for Vue that allows us to run a Vue website on our local machine, to develop our project before sending it to the Netlify pipeline (and thus the world!)
You should see some text directing you to your local website at::
http://localhost:3000/
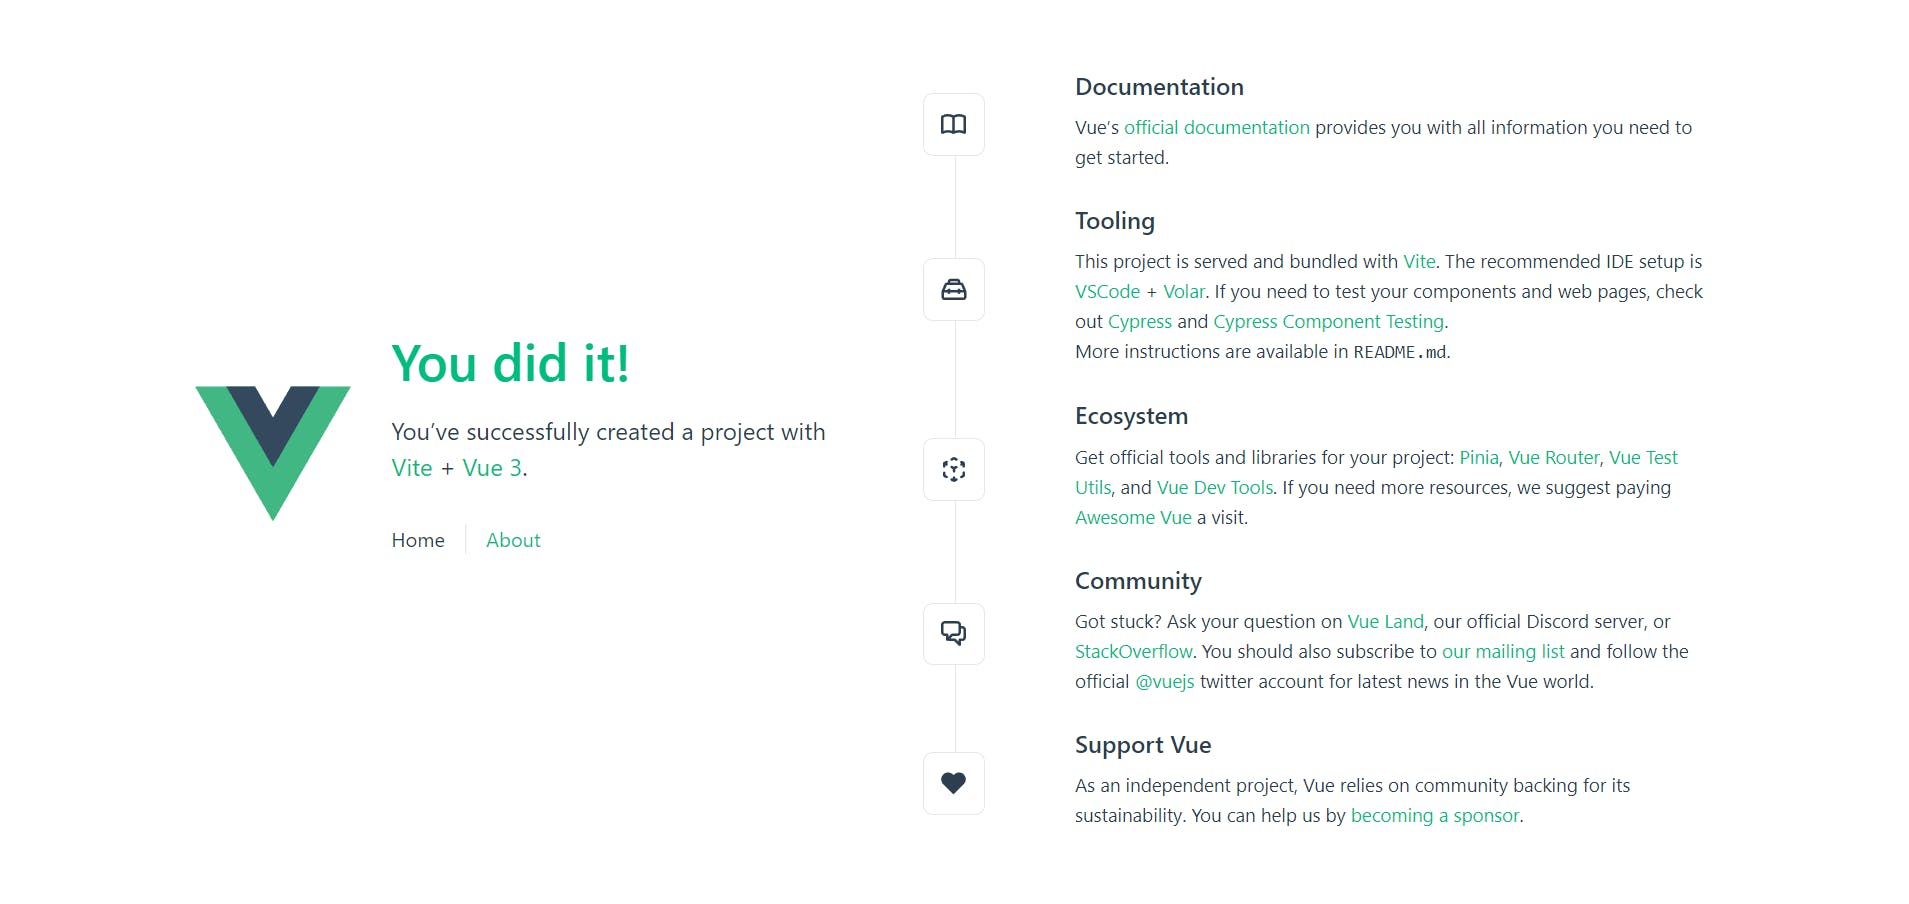
If you navigate to that in a browser, you should see your new website
adding the other dependencies
You can turn your server off by pressing Ctrl + c and then y to the dialog if it asks. I usually just mash Ctrl + c until it turns off.
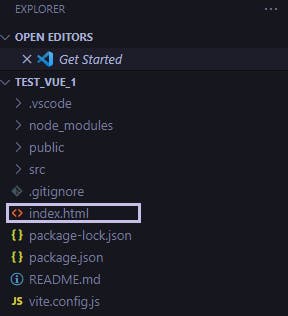
You can run code . in your project folder to open up vs code, or however you want to open the project and view the files. You should see all the files the Vue build tool made for us. Navigate to the index.html file
Here you can change the <title> tag to reflect your App name if you like. But we are really here to add some links and scripts to this file. Add
<!-- p5.glitch -->
<script src="https://cdn.jsdelivr.net/npm/p5.glitch@latest/p5.glitch.js"></script>
between the <head> tag to allow us to make a Glitch object, to use the glitch functions in our project. If you want to add this version of Bootstrap 5, you can also add
<!-- bootstrap -->
<link href="https://cdn.jsdelivr.net/npm/bootstrap@5.0.2/dist/css/bootstrap.min.css" rel="stylesheet" integrity="sha384-EVSTQN3/azprG1Anm3QDgpJLIm9Nao0Yz1ztcQTwFspd3yD65VohhpuuCOmLASjC" crossorigin="anonymous">
and add
<!-- bs5 js bundle -->
<script src="https://cdn.jsdelivr.net/npm/bootstrap@5.0.2/dist/js/bootstrap.bundle.min.js" integrity="sha384-MrcW6ZMFYlzcLA8Nl+NtUVF0sA7MsXsP1UyJoMp4YLEuNSfAP+JcXn/tWtIaxVXM" crossorigin="anonymous"></script>
after the body tag. This will allow you to use bootstrap classes and functions in making the site layout and look. If you are following along, the index.html should look like this:
<!DOCTYPE html>
<html lang="en">
  <head>
    <meta charset="UTF-8" />
    <link rel="icon" href="/favicon.ico" />
    <meta name="viewport" content="width=device-width, initial-scale=1.0" />
    <title>Vite App</title>
    <!-- p5.glitch  -->
    <script src="https://cdn.jsdelivr.net/npm/p5.glitch@latest/p5.glitch.js"></script>
    <!-- bootstrap -->
    <link href="https://cdn.jsdelivr.net/npm/bootstrap@5.0.2/dist/css/bootstrap.min.css" rel="stylesheet" integrity="sha384-EVSTQN3/azprG1Anm3QDgpJLIm9Nao0Yz1ztcQTwFspd3yD65VohhpuuCOmLASjC" crossorigin="anonymous">
  </head>
  <body>
    <div id="app"></div>
    <script type="module" src="/src/main.js"></script>
  </body>

<!-- bs5 js bundle -->
<script src="https://cdn.jsdelivr.net/npm/bootstrap@5.0.2/dist/js/bootstrap.bundle.min.js" integrity="sha384-MrcW6ZMFYlzcLA8Nl+NtUVF0sA7MsXsP1UyJoMp4YLEuNSfAP+JcXn/tWtIaxVXM" crossorigin="anonymous"></script>

</html>
vue architecture
So now that we have our project setup with the things we might need to get started, we can start on setting up the components we will need. In thesrc folder, you will see a components folder and a views folder. These can be as modular as helps you to envision and map a project. Generally, Views are pages, while Components are parts of a page. You can even have components within components (as far down as you like) but our project will be pretty simple.
We will have a HomeView View that runs the Vue functions and takes care of the logic on the home page, and passes the data that the user has specified to our p5sketch, which will live in a component maybe called SketchMain, which takes care of handling the data it has been given and glitching the image, and presenting the image to the user:
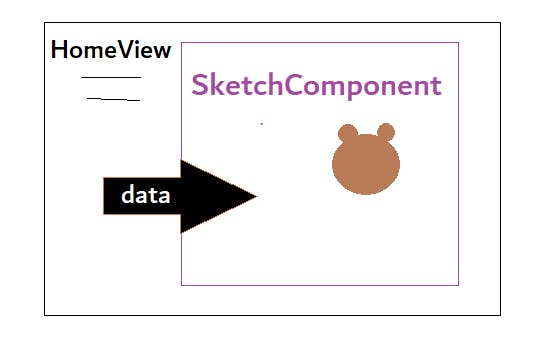
So let's try to set up our project to have the component we want, and put maybe just a title or work on each part to label them.
First we are going to set up our App.vue, this is our main app that hosts all the Views, like HomeView or AboutView, to simply display the Vue route we are on, in this instance the Home route or the homepage. You can replace the code with this code in this file:
<script setup>
import { RouterView } from "vue-router";
</script>

<template>
  <RouterView />
</template>

<style>
@import "@/assets/base.css";
</style>
All I've done is delete what we don't need. Out of the box, Vue comes with a more complicated setup than we currently need. You can remove the excess or use the code above.
script setup will import the tools from vue router to render the "route" or page. We are using the composition api here! Congrats for using the most cutting edge vue api if you are following along, btw 😎 setup is the "syntactic sugar" that lets vue know this is utilizing that api essentially. More on that: vuejs.org/api/sfc-script-setup.html#script-..
The <template> simply displays the View of the route we are on, and the <style> piece imports our css asset located in the assets folder. It's called base.css, and it's probably fine for now.
Next go to HomeView.vue in the views folder. This is going to be our main page. I like to have the template at the top, so after moving, I'm going to change the Component instances of TheWelcome to be the component I want: namely SketchMain. Once you have changed it in the element, and in the script you should have a View that looks like this:
<template>
  <main>
    <SketchMain/>
  </main>
</template>

<script setup>
import SketchMain from '@/components/SketchMain.vue'
</script>
Using Bootstrap grid system (container, row, column), Im going to set up our architecture to have our Homeview live in sort of 3 out of the 12 columns, and the sketch component live in the other 9 columns:
<template>
<div class="container">
  <div class="row">
    <div class="col-md-3">
        <h1 class="display-5">Glitch App</h1>
    </div>
  <div class="col-md-9">
    <SketchMain />
  </div>
  </div>
</div>
</template>

<script setup>
import SketchMain from '@/components/SketchMain.vue'
</script>
Giving an html the class container with Bootstrap active in the project gives it a certain style and allows us to organize the content into rows using the next class. We just need the one for now
The column class is how we define what's in those and what size we want them to be
So the code above delineates that the project is a single row divided into 2, on one, smaller side are the controls, then the bigger side is the sketch, at least on bigger displays (like a laptop or desktop computer). More on this useful Bootstrap grid system: getbootstrap.com/docs/5.1/layout/grid
Now we need a Canvas component that says "SketchMain" when it is placed in the template, to stand in for where our canvas will go.
Navigate to the HelloWorld.vue component in the components folder and hit Ctrl + Shift + s to Save As, essentially creating a copy template of the Hello World component to use. Name it SketchMain.vue. Delete everything out of the <template> <script> and <style scoped> tags. These are the three building blocks of a Vue component. The template holds the html pieces, <script>, the javascript and what you would like to provide to the html through javascript, and the <style> tag holds the css scoped or "limited" to this component. Once you clear those out, it should look like this:
<template>

</template>

<script setup>

</script>


<style scoped>

</style>
I have once again moved the template tag to the top as you can see. I think its just a common convention from the Vue 2 docs. Anyway, we are going to remove the setup "syntactic sugar" from our script tag, to allow us to use the options api rather than composition api in Vue 3.
In the <template> I am going to type <p>SketchMain</p> I'm also going to remove the style tag, as I will style in the base.css file if I need to do anything in this tutorial. Your component should look like this:
<template>
<p>SketchMain</p>
</template>

<script>

</script>


<style scoped>

</style>
Let's see if we can render it, and make sure things are working properly, if your server isn't up, navigate to the folder and run npm run dev in the command line, and navigate to your local site at http://localhost:3000/ to see it change. You can leave this running and watch it change as you edit code, if you want. Vite is... fast 🔥
You should see:

We now have everything in vue architectured for now and all of our components set up! Congrats us~!🎉
p5.js function
Now let's try and create the p5 function for glitching in our SketchMain.vue component. Navigate there and put two elements in the <template>:
<div ref="sketchWrapper">
      <div id="sketchParent"></div>
  </div>
the <div ref="sketchWrapper"> element is a wrapper we will call on to check for sizing before we actually have a canvas to measure. the ref attribute is a part of Vue 3 that will make that a reactive component and give us access to the "DOM" element, so the we can measure its properties (specifically the width in our case). More on refs here: vuejs.org/guide/essentials/template-refs.ht..
the <div id="sketchParent"></div> is where we are going to call in the canvas and sketch our image once it is ready.
Next for the <script> tag, put in
import p5 from "p5";
at the top. This will use "p5" which we installed with npm earlier and allow us to use p5 from it, which is a way to create and draw the sketch we want to create on the screen. Then we are going to define our export and put everything else inside of it like this:
<script>
//p5 import
import p5 from "p5";

export default {

}
</script>
The first thing we will define are the props we want from the parent, aka HomeView.vue where this sketch is living. HomeView will pass it data, and we want to declare what we are expecting, like so:
props: {
        sketchParent: String,
        imgSrc: String,
        numRandomBytes: Number,
    },
More about props here vuejs.org/guide/components/props.html#props
Next we want to define a data object, basically it returns the data we want available in the template, this will hold our p5 instance once we have made it, so lets make an empty object and call it myp5:
data() {
    return {
        myp5: {},
    }
},
Now the big part, we want to create a methods section and the first method we want to make is one that builds our sketch, called buildSketch, make a methods object with a buildSketch function that takes two parameters, elm for element that this will be rendered at (the one we made in the template), and p for props that we will pass in, essentially the Sketch data.
We are first going to get the parameters of the div we are in for the sketch then start a new p5 constructor, and save it to the object we've created.
You can use this code:
methods: {
    buildSketch(elm, p) {
        let containerWidth = this.$refs.sketchWrapper.clientWidth;
        let containerHeight = window.innerHeight;

        this.myp5 = new p5(function (sketch) {
}, parent);
}
},
Essentially we've created a method or function that will build the sketch and display the image soo, and told it to put it in "parent" the id that we will define later from elm. More on defining methods in vue: vuejs.org/api/options-state.html#methods
Next, we want to create a mounted() hook, that will run our sketch when our app starts, like so:
mounted() {
      //build the sketch when mounted
    this.buildSketch(this.sketchParent, this.$props);
  },
This takes two arguments, the first is a prop that we defined earlier, the next is the props that we will pass in general. Mounted hooks: vuejs.org/api/options-lifecycle.html#mounted
Finally, we want to create a "watcher" or something that will execute some code when it sees something change (so vigilant). Here is the code I used:
 watch: {
    $props: {
      handler(newValue) {
        this.myp5.remove();
        this.buildSketch(this.sketchParent, newValue);
      },
      deep: true,
    },
  },
The above is essentially a built-in function of vue that I have set to watch for any change in the $props passed to the component, and when something changes, I want to remove the old p5 object, and build a new one. On watchers: vuejs.org/guide/essentials/watchers.html#ea..
This is probably not the most elegant solution, but I wanted something that would be easier to build and understand for my MVP.
Your file should look like this:
<template>
<div ref="sketchWrapper">
      <div id="sketchParent"></div>
  </div>
</template>

<script>
//p5 import
import p5 from "p5";

export default {
    props: {
        sketchParent: String,
        imgSrc: String,
        numRandomBytes: Number,
    },
    data() {
        return {
            myp5: {},
        }
    },
    methods: {
        buildSketch(elm, p) {
            let containerWidth = this.$refs.sketchWrapper.clientWidth;
            let containerHeight = window.innerHeight;
            let parent = document.getElementById(elm);

            this.myp5 = new p5(function (sketch) {
            }, parent);
        }
    },
    mounted() {
        //build the sketch when mounted
        this.buildSketch(this.sketchParent, this.$props);
    },

    watch: {
    $props: {
      handler(newValue) {
        this.myp5.remove();
        this.buildSketch(this.sketchParent, newValue);
      },
      deep: true,
    },
  },

}
</script>


<style scoped>

</style>
Now lets fill out our sketch function. p5.js sketches take a setup and draw function, additionally ours will use a preload function, and make up our own function a glitched function, so lets set those up in our p5 constructor function like so:
methods: {
        buildSketch(elm, p) {
            let containerWidth = this.$refs.sketchWrapper.clientWidth;
            let containerHeight = window.innerHeight;
            let parent = document.getElementById(elm);

            this.myp5 = new p5(function (sketch) {
                sketch.preload = () => {
                };
                sketch.setup = () => {
                };
                sketch.draw = () => {
                };
                sketch.glitched = () => {
                };
            }, parent);
        }
    },
In preload() we want to set up our Glitch object, and initalize some of the properties, load the image and call our glitched() function in the callback:
sketch.preload = () => {
                sketch.glitch = new Glitch(sketch); // new glitch object
                sketch.glitch.loadType('jpg');
                sketch.glitch.loadQuality(1);
                sketch.glitch.loadImage(p.imgSrc, function () { //load the image for glitching
                    sketch.glitched(); //callback to glitch an image when its loaded
                });
            };
We are saying, hey we want a new Glitch object called glitch, and we want it to start in 'jpg' type, with a quality of 1 or 100%, run the loadImage() function, using the source we will provide, the call the glitched() fuinction we made on it when its loaded. For more on this, check out the p5.glitch docs: p5.glitch.me/#images
Next, the setup() function should create the canvas once the picture is loaded, and setup the rendering space like so:
sketch.setup = () => {
                sketch.createCanvas(containerWidth, containerHeight - 10);
                sketch.imageMode(sketch.CENTER);

                sketch.glitch.errors(false); //I know what I'm doing to the image is wrong
                sketch.disableFriendlyErrors = true; //We're friendly but still..
                sketch.noLoop(); //only draw the image once, rather than continuing to try to animate it


            };
This creates a canvas from the width and height we defined at the beginning of the script, set the image mode to CENTER and turned off some errors. I also set the sketch to noLoop() which sets us up to draw only once rather than animate, to save computing power. This is why we used the preload function, essentially, aside from readability.
Our draw() function will draw the sketched image and place it in the center of the canvas we setup in the last function:
sketch.draw = () => {
                 sketch.image( sketch.glitch.image, sketch.glitch.image.width / 2, sketch.glitch.image.height / 2 );
            };
This function now loads the image from glitch.image into sketch.image and displays in the middle of the canvas (half way down the width, and half way down the height).
Your methods function should look like this:
methods: {
        buildSketch(elm, p) {
            let containerWidth = this.$refs.sketchWrapper.clientWidth;
            let containerHeight = window.innerHeight;
            let parent = document.getElementById(elm);

            this.myp5 = new p5(function (sketch) {
                sketch.preload = () => {
                sketch.glitch = new Glitch(sketch); // new glitch object
                sketch.glitch.loadType('jpg');
                sketch.glitch.loadQuality(1);
                sketch.glitch.loadImage(p.imgSrc, function () { //load the image for glitching
                    sketch.glitched(); //callback to glitch an image when its loaded
                });
            };
                sketch.setup = () => {
                sketch.createCanvas(containerWidth, containerHeight - 10);
                sketch.imageMode(sketch.CENTER);
                sketch.glitch.errors(false); //I know what I'm doing to the image is wrong
                sketch.disableFriendlyErrors = true; //We're friendly but still..
                sketch.noLoop(); //only draw the image once, rather than continuing to try to animate it


            };
               sketch.draw = () => {
                 sketch.image( sketch.glitch.image, sketch.glitch.image.width / 2, sketch.glitch.image.height / 2 );
            };
                sketch.glitched = () => {
                };
            }, parent);
        }
    },
adding glitch function
Finally! our glitched() function will use the number of random bytes prop we defined earlier and will expect from Vue to utilize the randomBytes function in p5.glitch to make a basic glitch function. Set up the function like this:
sketch.glitched = () => {
              sketch.glitch.randomBytes(p.numRandomBytes); // set random bytes, throughout data
              sketch.glitch.buildImage();
            };
This will take the numRandomBytes from the props, and do that many random bytes in the image data, then build the image from those bytes. More on this function here: p5.glitch.me/#glitch-functions
Lets go back to our Vue component, and pass those props and give it a picture so we can see our glitch in action, navigate to HomeView.vue. remove setup from the <script> tag and put in the following script:
<script>
import SketchMain from "@/components/SketchMain.vue";
import imgUrl from "../assets/bear.jpg";

export default {
  components: {
    SketchMain,
  },


  data() {
    return {
      sketchData: {
        sketchParent: "sketchParent",
        imgSrc: imgUrl,
        numRandomBytes: 50,
      },
    }
  },
}

</script>
The above code imports an image URL along with our Sketch component, sets up our export, with a data object called SketchData. This object has some properties we are planning to utilize in the p5 script we just made
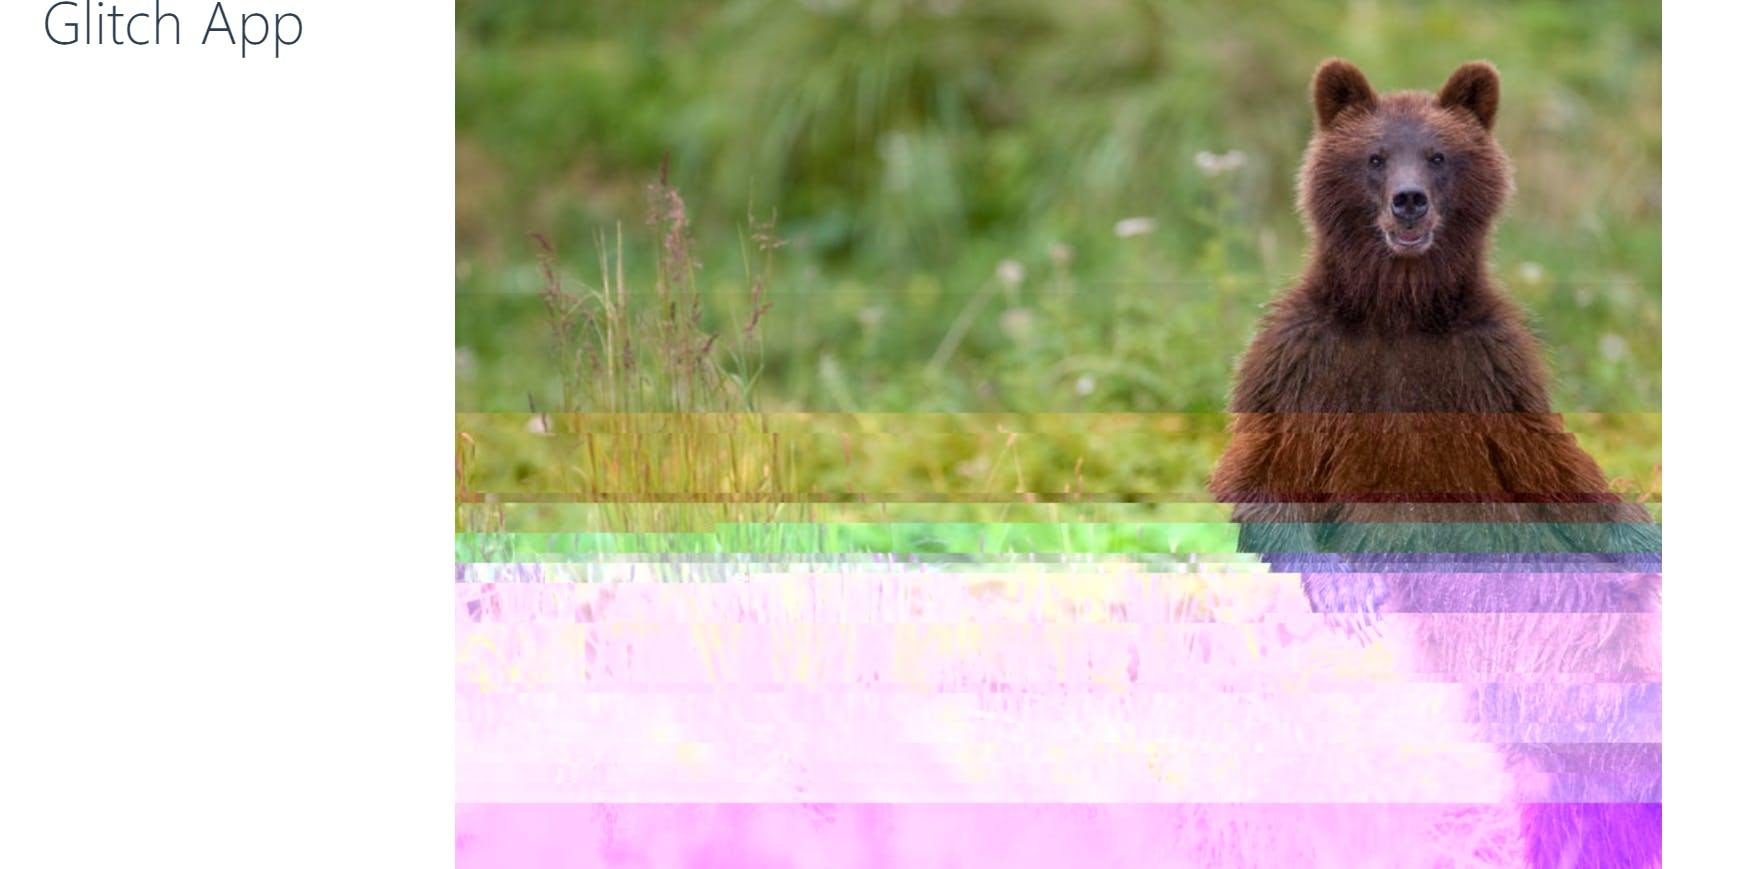
Next you need to put an image into the assets where the bear is in my code, I just searched bear on google and saved it into the assets folder of my project.
Now we bind our props to our component, in the template, change our <SketchMain /> component to:
<div class="col-md-9">
    <SketchMain v-bind="sketchData" />
  </div>
More on prop binding: vuejs.org/guide/components/props.html#props
If you look at your page, you should see your sketch glitch!!
make it dynamic with vue
So now, lets make a slider to make an interactive control for the "Intensity" of the glitch. Navigate to HomeView.vue if you aren't still there.
Now that we have everything set up, you are going to be surprised how easy this is. SImply put this element in your <template>, perhaps under the <h1>:
<label for="numRandomBytes">numRandomBytes</label>
        <input
        type="range"
        id="numRandomBytes"
        v-model.number="sketchData.numRandomBytes"
        name="numRandomBytes"
        min="1"
        max="100"
        />
This creates a "range" input, that is a slider for values, I am defining a min and max value, as well as getting a number from it and "modeling" or keeping the same as a property in my sketchData, which we initialized in our object already as 50.
Save your project and you now have an interactive slider to change your glitch functions "intensity" or how many random bytes you are changing.
image change function
What if you want to upload different pictures and not just whatever you chose to include in the project initially? Let's make a Image upload and function on the same HomeView.vue page to handle that.
First, add a file input
<label for="formFile" class="form-label h4">
            Image Upload
        </label>
        <input class="form-control" type="file" id="formFile" accept="image/png, image/jpeg" @change="onFileChange" />
This is a file Upload input, that will call an "onFileChange" method whenever the change action happens to it. More about event handlers in vue: vuejs.org/guide/essentials/event-handling.h..
So let's go define that in a methods object in our script like so:
  methods: {
    //changes the image source into something usable when file input is used
    onFileChange(e) {
      const file = e.target.files[0];
      let i = new Image();
      this.sketchData.imgSrc = URL.createObjectURL(file);
      i.src = this.sketchData.imgSrc;
      i.onload = () => {
        this.sketchData.imgW = i.naturalWidth;
        this.sketchData.imgH = i.naturalHeight;
      };
    },
}
This simply collects the event data, creates an Image element that it makes into a source url and gets the width and height of. We dont do anything with that in our current script, and I'm not sure this blog will contain a part about doing the UI. It's already getting pretty... long...
anyway, lets define those:
data() {
    return {
      sketchData: {
        sketchParent: "sketchParent",
        imgSrc: imgUrl,
        numRandomBytes: 50,
        imgW: 1200,
        imgH: 900,
      },
    }
  },
I just used the size of the bear picture I included, you should do whats appropriate for the picture you chose.
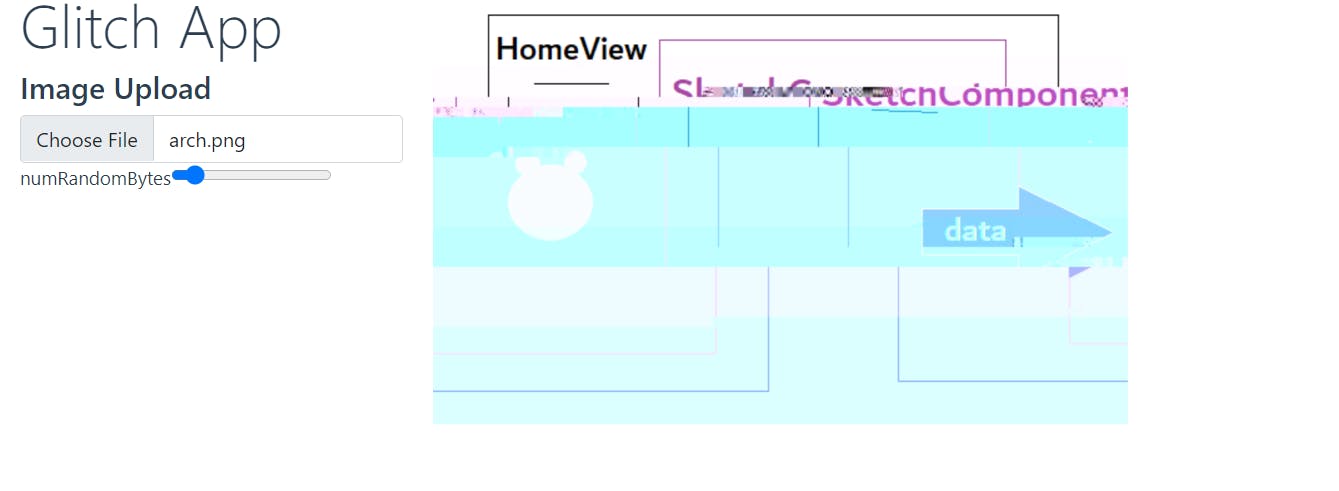
You should now have a working picture upload function:
add another image/glitch type
Lets change from jpg to webp glitching. For this, I'm going to get a couple of default radio buttons from bootstrap, and label one jpg, and one webp, and insert it into my template on HomeView.vue:
<div class="form-check">
  <input class="form-check-input" type="radio" name="exampleRadios" id="exampleRadios1" value="option1" checked>
  <label class="form-check-label" for="exampleRadios1">
    jpg
  </label>
</div>
<div class="form-check">
  <input class="form-check-input" type="radio" name="exampleRadios" id="exampleRadios2" value="option2">
  <label class="form-check-label" for="exampleRadios2">
    webp
  </label>
</div>
I'm going to change the value they are outputting to match the type we are looking for, and model it to a value we will define in the script:
<div class="form-check">
  <input class="form-check-input" type="radio" name="exampleRadios" id="exampleRadios1" value="jpg" v-model="sketchData.glitchExtType" checked>
  <label class="form-check-label" for="exampleRadios1">
    jpg
  </label>
</div>
<div class="form-check">
  <input class="form-check-input" type="radio" name="exampleRadios" id="exampleRadios2" value="webp" v-model="sketchData.glitchExtType">
  <label class="form-check-label" for="exampleRadios2">
    webp
  </label>
</div>
now we are going to define the variable in our script in this file, and initialize it as "jpg":
 data() {
    return {
      sketchData: {
        sketchParent: "sketchParent",
        imgSrc: imgUrl,
        numRandomBytes: 50,
        imgW: 1200,
        imgH: 900,
        glitchExtType:"jpg"
      },
    }
  },
Finally, lets go to SketchMain.vue, tell it to expect it as a prop, and change that part of the script to a variable:
export default {
    props: {
        sketchParent: String,
        imgSrc: String,
        numRandomBytes: Number,
        glitchExtType:String,
    },
And in the preload() function, we are going to change the sketch.glitch.loadType('jpg'); function to sketch.glitch.loadType(p.glitchExtType); like so:
 sketch.preload = () => {
                sketch.glitch = new Glitch(sketch); // new glitch object
                sketch.glitch.loadType(p.glitchExtType);
                sketch.glitch.loadQuality(1);
                sketch.glitch.loadImage(p.imgSrc, function () { //load the image for glitching
                    sketch.glitched(); //callback to glitch an image when its loaded
                });
            };
One issue is that Webp acts differently at 100% quality than any other quality, so lets make the quality a variable as well.
In HomeView.vue, define a new image quality prop in the script, that will start at 100:
Data() {
    return {
      sketchData: {
        sketchParent: "sketchParent",
        imgSrc: imgUrl,
        numRandomBytes: 50,
        imgW: 1200,
        imgH: 900,
        glitchExtType:"jpg",
        imgQuality:100,
      },
    }
  },
For the radio button, lets set jpg at 100 quality, and webp at 99 quality by creating a glitchType handler function, on both of the radios add a @change handler
div class="form-check">
  <input class="form-check-input" type="radio" name="exampleRadios" id="exampleRadios1" value="jpg" v-model="sketchData.glitchExtType"
  @change="glitchType('jpg')">
  <label class="form-check-label" for="exampleRadios1">
    jpg
  </label>
</div>
<div class="form-check">
  <input class="form-check-input" type="radio" name="exampleRadios" id="exampleRadios2" value="webp" v-model="sketchData.glitchExtType"
  @change="glitchType('webp')">
  <label class="form-check-label" for="exampleRadios2">
    webp
  </label>
</div>
and define the handler in the methods section::
glitchType(type) {
      if (type == "jpg") {
      this.sketchData.imgQuality = 100;
      }
      if (type == "webp") {
        this.sketchData.imgQuality = 99;
      }
      },
    },
Finally in SketchMain.vue lets use this quality. Define it in props as a number:
props: {
        sketchParent: String,
        imgSrc: String,
        numRandomBytes: Number,
        glitchExtType:String,
        imgQuality: Number,
    },
under the buildSketch() function we are going to make a new variable called, imgQuality and since out loader takes a value from 0-1 as a percent(0.01-1.00), lets divide our number by 100 to get the quality:
let imgQuality = this.imgQuality/ 100;
and use it in our preload function as sketch.glitch.loadQuality(imgQuality);
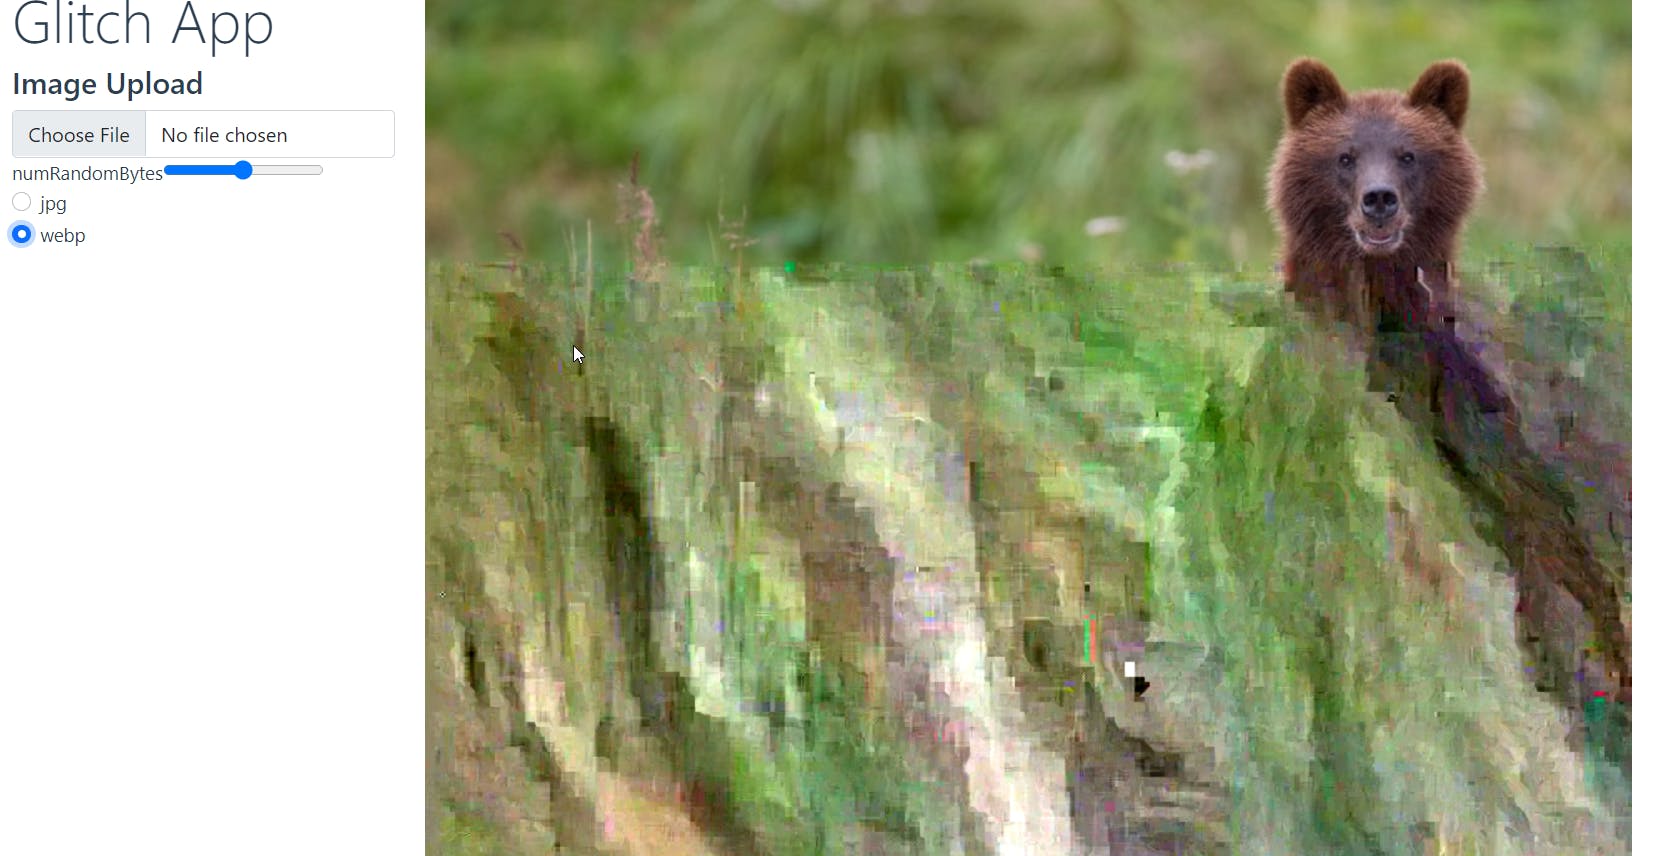
If we load our changes we should have a new, second, Glitch type! 🥂✌💕
Deploying & hosting with Github -> Netlify ╰(°▽°)╯
Ok so we have something we are proud of and want to share with the world. Simply go to your github (or make one if you don't have one) and start a new repository:

Enter your information and follow the directions to push your code to the repository. It is usually a set of commands like:
echo "# sean-is-cool" >> README.md
git init
git add README.md
git commit -m "first commit"
git branch -M main
git remote add origin https://github.com/myusername/this-is-cool.git
git push -u origin main
Once you have your repository setup, login to Netlify or create a netlify account. You can login with your github if you like. Simply select a Add new site, follow the few prompts::
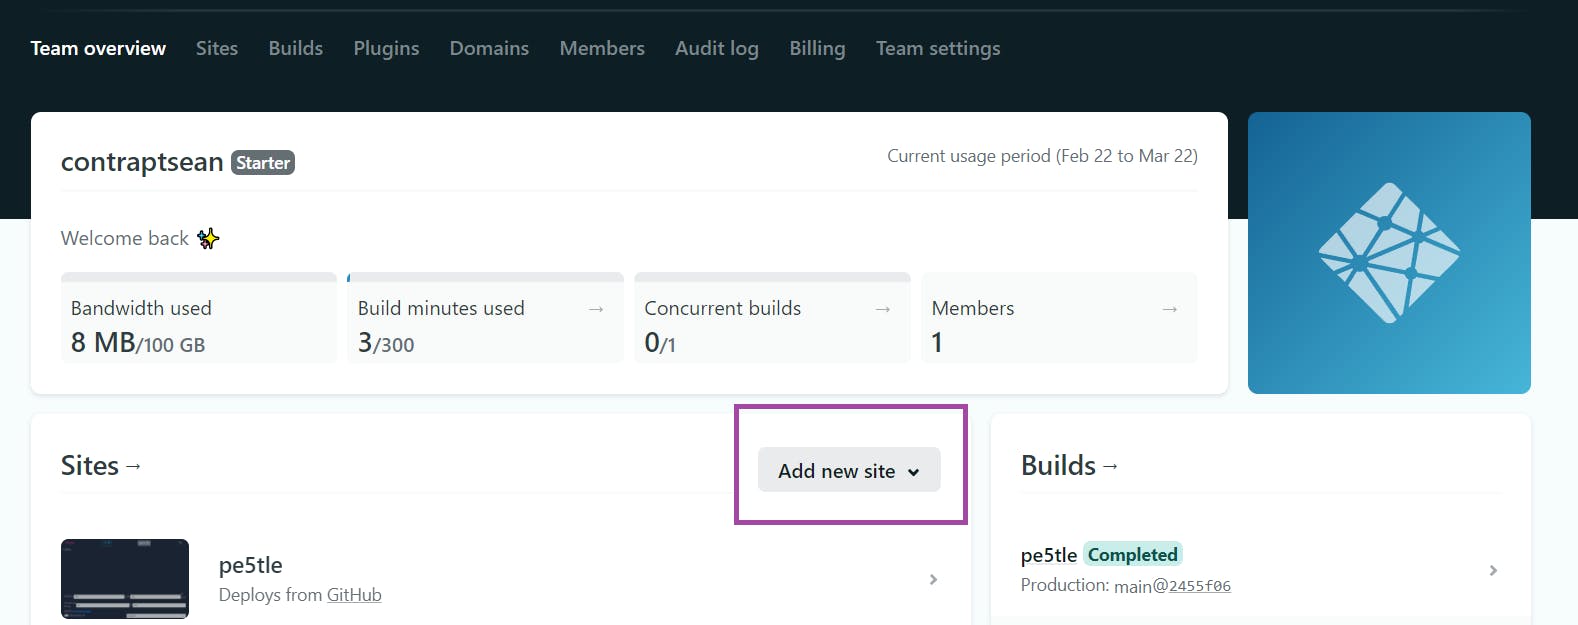
And watch yourself become internet famous for the cool things you just built 😎 🎈 💯
Issues & Pain points
I had a rough time on some of these functions.
Figuring out how to use an image from a computer on a website was a challenge. I provided that function here in the image upload section.
I learned a lot about how renderers and p5.js work. I learned a lot about how not to copy Objects in javascript, and what would and wouldn't work with Vue.
The save full size function took forever. Ultimately for the function, I save a buffer of bytes which I later use to reconstitute the image for saving. It was a very computationally cheap way to do it too.
I spent a lot of time working on the resizing functions and considerations for running something on a phone that was maybe not meant to do so, at least not as much as other libraries.
There are a lot of bugs, particularly in the mobile view I think. I would love to squash them, but I feel like I spent too much time squashing bugs and not enough time building out more glitch functions in this project.
What's Next for pe5tle
I think I need a break for a week or two at least 😅
I would like to do more glitch functions, but I need to decide if I want to keep going with p5, or try to refactor into an engine like Pixi.js that might work a bit better in general.
I have a whole list of todos on the github so once I decide if I want to keep moving forward with this engine or refactor, then I'd like to do some of those things maybe. Ultimately I just wanted to make a little portfolio project so we will see how far this goes
Who Am I
My name is Sean (hello!), and I'm sorry about the long blog post. I guess I had a lot to talk about here. A lot of functions on the final product that I just didn't have time to discuss. Anywho I like to code and make web things and I'm trying to share it more with others. If there's any problems on the code or you want to reach out or ask questions, holla at wax.alchemical@gmail.com, or feel free to leave a comment here!
I'm just a guy who likes glitch art and wants to share it with people while participating in the hashnode x netlify hackathon. Thanks for reading!